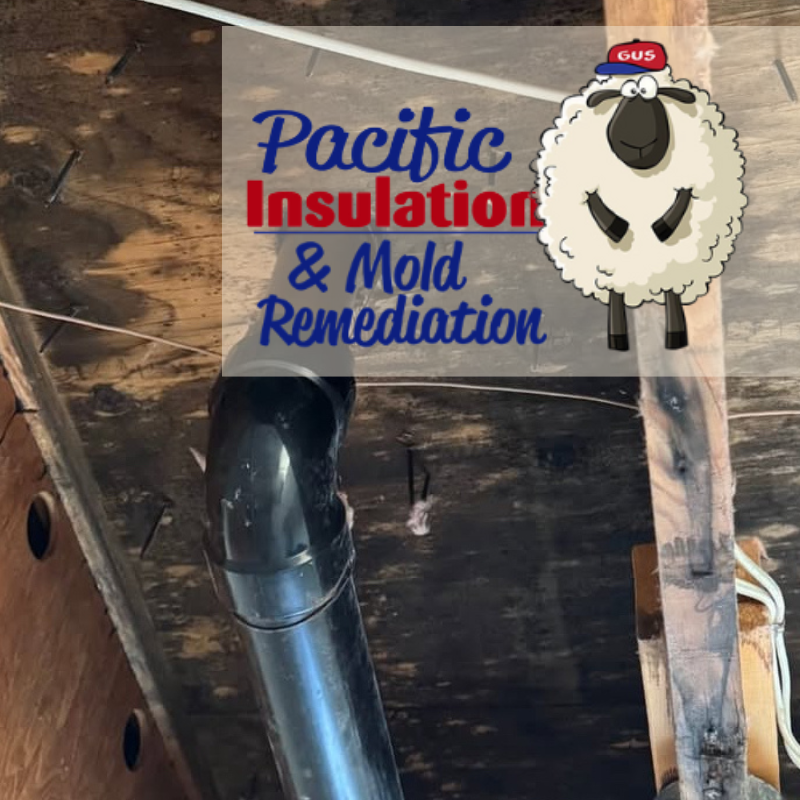
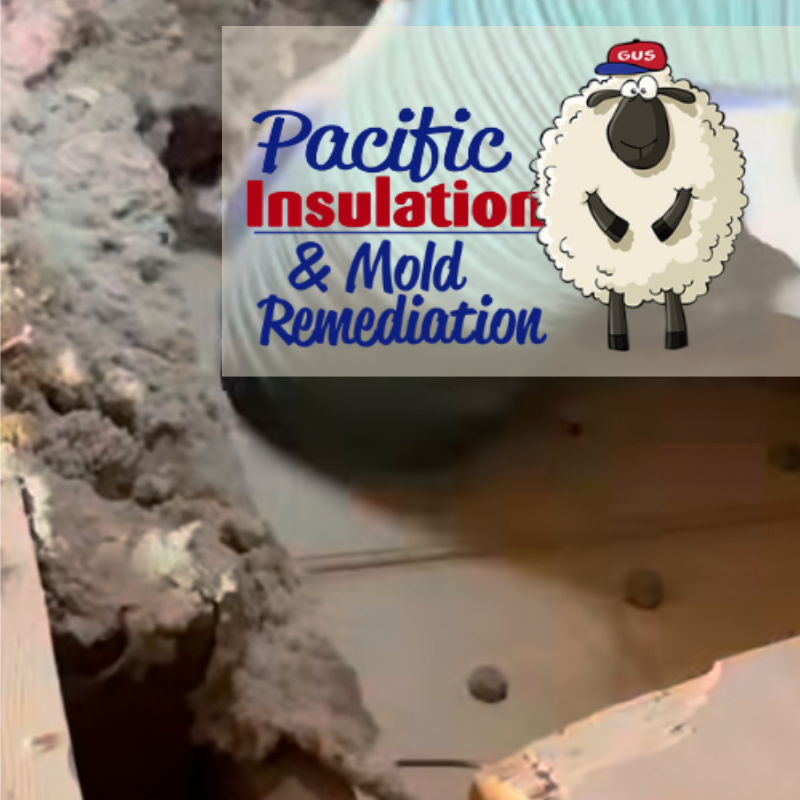
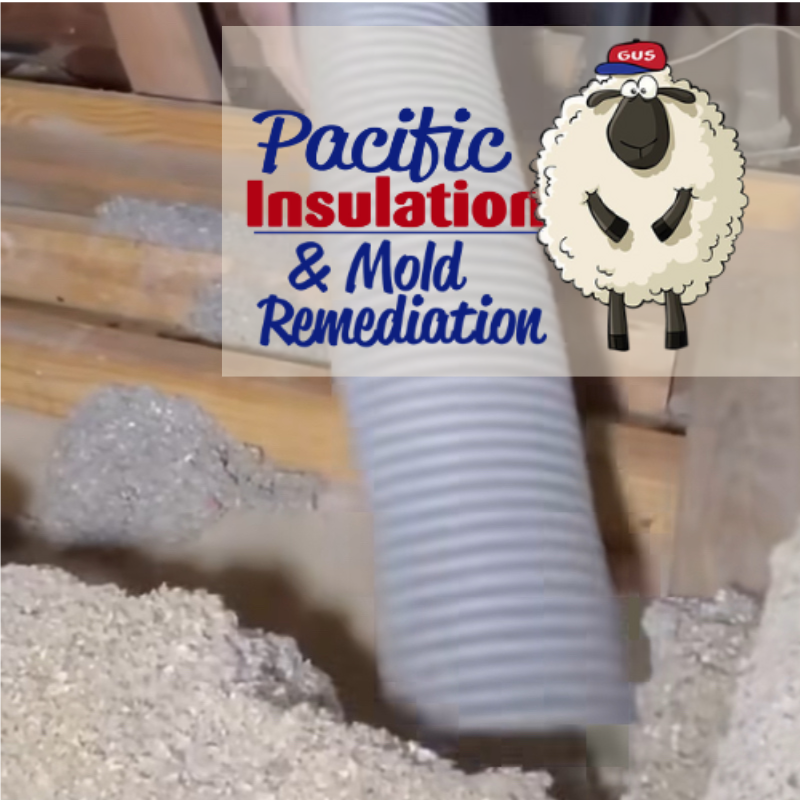
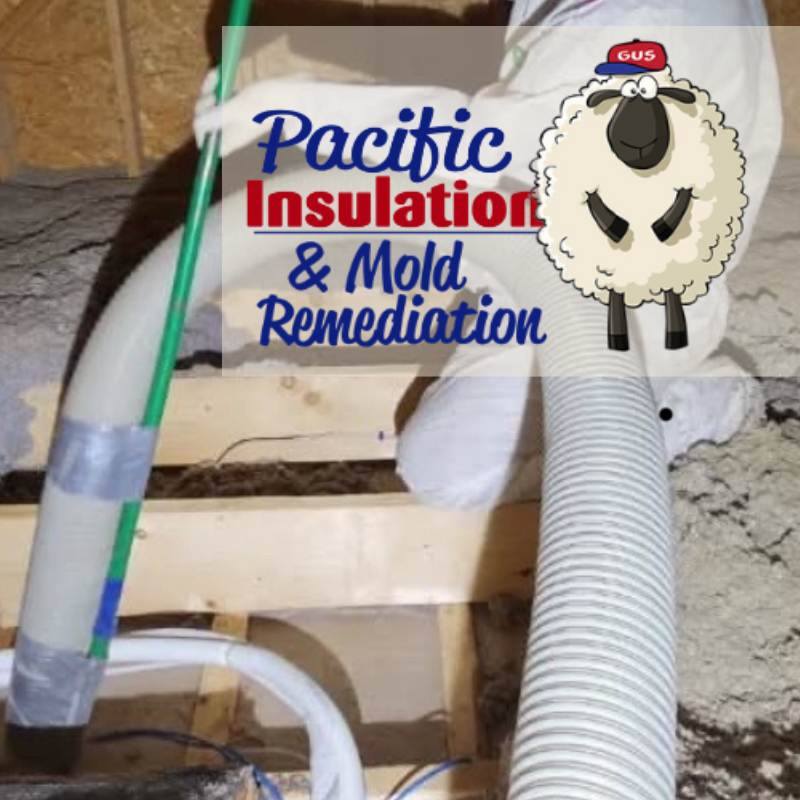
Black Mold in Attics in Spokane

Black Mold in Attics in Spokane & CDA: Why Immediate Treatment is Essential

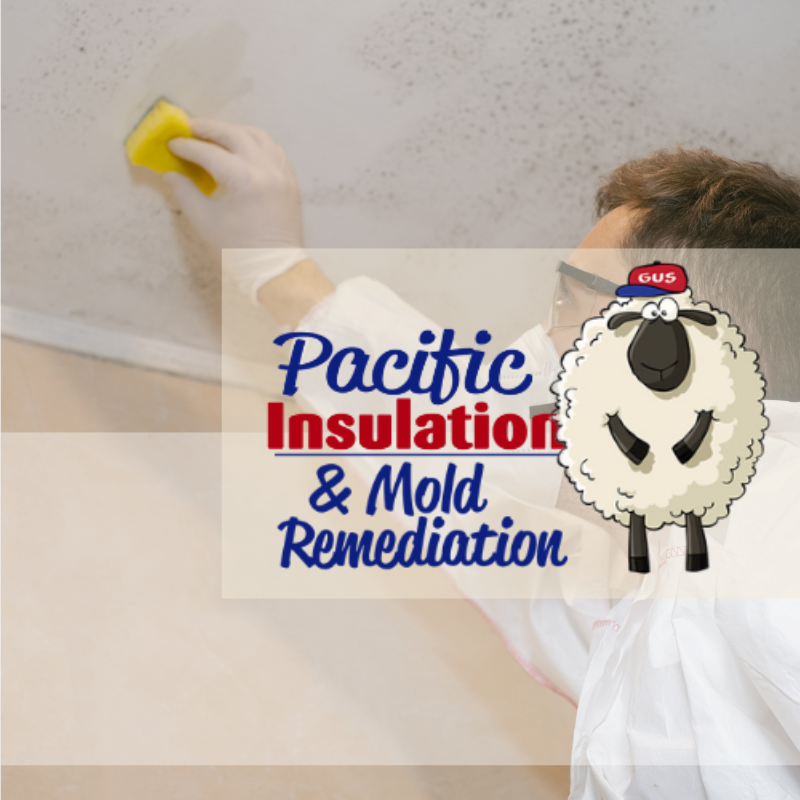
Black mold in attics is a serious concern for homeowners in Spokane & CDA. With the region's cold winters, damp springs, and hot summers, mold growth in attics is more common than many realize. Left untreated, black mold can threaten your home's structural integrity and the health of your family.

What Is Black Mold?

Black mold, or Stachybotrys chartarum, is a toxic fungus that thrives in moist, poorly ventilated environments. It often appears as dark green or black patches on wood, insulation, and drywall.

In Spokane attics, it tends to grow due to:

  • Inadequate ventilation
  • Poor insulation
  • Roof leaks
  • Condensation from warm indoor air meeting cold attic surfaces

Why Is Black Mold Dangerous?

Black mold produces mycotoxins, which can become airborne and spread throughout your home. These toxins are especially harmful to those with asthma, allergies, or weakened immune systems.

Health symptoms include:

  • Chronic coughing or sneezing
  • Irritated eyes and throat
  • Headaches and fatigue
  • Skin rashes or worsening allergy symptoms

For Spokane homeowners, long-term exposure to black mold can significantly impact quality of life, especially during winter months when indoor air circulation is limited.

How to Identify Mold in Your Attic

Common signs of attic mold include:

  • Dark stains or fuzzy growth on wood beams or insulation
  • Musty, damp odors coming from ceilings or attic vents
  • Visible condensation on rafters or the underside of the roof
  • Warping or softening of wood materials

If any of these signs are present, it's crucial to schedule a professional mold inspection.

Why Immediate Treatment Matters

In Spokane's variable climate, untreated black mold spreads rapidly. Delaying remediation can lead to:

  • Extensive structural damage
  • High repair costs
  • Increased health risks
  • Decreased home value

Additionally, black mold in the attic often goes unnoticed until it's already widespread, making early intervention critical.

Professional Mold Remediation in Spokane

Treating attic mold is not a DIY job. Certified mold remediation professionals in Spokane use specialized tools to:

  • Identify the extent of mold growth
  • Contain and safely remove contaminated materials
  • Treat affected areas to prevent regrowth
  • Restore proper ventilation and moisture control

Local professionals also understand Spokane’s climate-specific risks, ensuring mold is not only removed but prevented from coming back.

Preventing Future Mold Growth

To keep your attic mold-free:

  • Install proper attic ventilation
  • Seal air leaks from bathrooms and kitchens
  • Ensure your roof and gutters are well-maintained
  • Use a dehumidifier in moist months if needed
  • Schedule seasonal attic inspections

Conclusion

Black mold in Spokane & CDA attics is more than just an eyesore—it’s a serious threat. If you suspect mold in your home, don't wait. Professional treatment is essential to protect your property, your health, and your peace of mind.


Common Home Inspection Issues to Watch For
By Gus Koedding April 24, 2025
Cracks and Settlement Imagine the foundation of your home as its backbone. If it's not strong and stable, everything else is at risk. Home inspectors often find cracks in the foundation, which can indicate settling or more serious structural issues. A few small cracks might be normal, but large cracks or those that let water seep through are a definite red flag. Cracks can be caused by natural soil movement, poor construction, or even tree roots growing too close to the structure. It's essential to differentiate between minor cosmetic cracks and those that signify significant structural concerns. A specialized foundation expert may be needed for a thorough assessment. Water Damage Water is great for a lot of things, but not when it comes to your home's foundation. Water damage can lead to mold, rot, and even more cracks. Inspectors will check for water pooling around the foundation or signs of water damage inside the basement or crawlspace. Proper drainage systems, such as gutters and downspouts, play a vital role in directing water away from the foundation. Poor grading or landscaping can also contribute to water accumulation, exacerbating foundational issues. Identifying water damage early can prevent further deterioration and costly repairs. Roof Troubles: Over Your Head and Out of Sight Shingles and Leaks The roof is your home's first line of defense against the elements. Loose or missing shingles are a common home inspection issue and can lead to leaks. Water leaking through the roof can cause damage to the interior of the home, leading to expensive repairs. Inspectors will often check for signs of wear, such as curling or buckling shingles, which can indicate the roof is nearing the end of its lifespan. Timely roof maintenance can extend its life and ensure it continues to protect your home effectively. Poor Ventilation Good ventilation is crucial to prevent moisture buildup and prolong the life of your roof. Home inspectors often find insufficient ventilation in attics, which can lead to mold growth and higher energy bills. Proper attic ventilation helps regulate temperature, reducing the strain on heating and cooling systems. It also prevents ice dams in colder climates, which can cause significant roof damage. Addressing ventilation issues can improve energy efficiency and indoor air quality. Plumbing Problems: The Flow Must Go On Leaky Pipes and Faucets A drippy faucet might seem like a minor annoyance, but it can be indicative of bigger plumbing problems. Inspectors will check for leaks under sinks, around toilets, and in basements. Leaks can lead to water damage and increase your water bill. Over time, unchecked leaks can also contribute to mold growth and structural damage. It's essential to address even minor plumbing issues promptly to prevent them from escalating into more serious problems. Water Heater Woes A home inspection will also include a check of the water heater. Inspectors look for signs of rust, leaks, or age, as these can all indicate that a replacement is needed soon. A failing water heater can lead to a lack of hot water and potential flooding if a tank bursts. Regular maintenance, such as flushing the tank to remove sediment buildup, can extend the life of the water heater and ensure its efficient operation. Electrical Issues: Keeping the Sparks in Check Outdated Wiring Older homes often have outdated wiring that can't handle modern electrical demands. This is not just an inconvenience; it's a safety hazard. Inspectors will check for knob-and-tube wiring or aluminum wiring, both of which may need to be updated. Outdated wiring systems can pose a risk of electrical fires and may not be compatible with current electrical codes. Upgrading the wiring not only ensures safety but also supports the use of modern appliances and technology. Faulty Outlets and Panels Loose outlets or overloaded electrical panels are common issues found during home inspections. These problems can lead to electrical fires, so it's important to address them promptly. Inspectors will also check for GFCI outlets in areas prone to moisture, such as kitchens and bathrooms, to reduce the risk of electric shock. Ensuring your electrical system is up to date can enhance safety and prevent disruptions in your daily life. HVAC Concerns: Your Comfort Zone Inefficient Systems Your heating and cooling systems should keep you comfortable without breaking the bank. During an inspection, the HVAC system will be checked for efficiency. Older systems or those in disrepair can lead to high energy costs and may need replacement. Regular maintenance, such as changing filters and cleaning ducts, can improve system efficiency and extend its lifespan. An efficient HVAC system not only reduces energy bills but also improves indoor air quality and comfort. Poor Insulation Insulation plays a huge role in maintaining your home's temperature. Inspectors often find insufficient or poorly installed insulation, which can lead to heat loss and higher energy bills. Proper insulation helps maintain a consistent indoor temperature, reducing the load on heating and cooling systems. Upgrading insulation in attics, walls, and crawlspaces can enhance energy efficiency and provide a more comfortable living environment year-round. Exterior Elements: More Than Just Curb Appeal Siding and Paint Problems The exterior of your home is like its armor. Cracked or peeling siding and paint can let moisture in, leading to rot and other damage. Inspectors will look for these common home inspection issues to ensure the exterior is in good condition. Regular maintenance, such as repainting and sealing, can protect the siding and prolong its lifespan. Addressing exterior issues promptly can prevent underlying damage and preserve the home's structural integrity. Window Woes Windows should seal tightly to keep the elements out. Inspectors will check for broken seals, cracks, and other issues that could affect energy efficiency. Drafty windows can lead to heat loss and increased energy bills, making it essential to address any issues found during an inspection. Upgrading to energy-efficient windows can improve insulation, reduce noise, and enhance the home's overall aesthetic. Interior Issues: Inside the Walls Mold and Mildew Mold is more than just unsightly; it can be a health hazard. Inspectors look for signs of mold and mildew, especially in areas prone to moisture like bathrooms and basements. Mold can cause respiratory issues and exacerbate allergies, making it crucial to address any growth promptly. Proper ventilation, moisture control, and timely repairs can prevent mold development and maintain a healthy indoor environment. Structural Woes Inside the home, inspectors will check for signs of structural issues like sagging floors or ceilings. These can indicate larger problems that need to be addressed. Structural issues may arise from poor construction, foundation problems, or water damage, and they often require professional evaluation and repair. Identifying and addressing structural concerns early can prevent more significant damage and ensure the home's safety and stability. Conclusion: Be Prepared, Not Surprised Knowing the common house inspection issues can help you prepare for what might come up during your home inspection. While it might be tempting to overlook some of these problems, remember that they can lead to bigger, more expensive repairs down the road. Being informed and proactive can save you a lot of headaches—and money—in the long run. Understanding the potential issues allows you to negotiate repairs or price adjustments with the seller, ensuring a fair deal. In the end, a thorough home inspection can be your best friend in the home-buying process. It helps you understand the true condition of the home and negotiate repairs or price adjustments as needed. So, keep these common home inspection concerns in mind, and you'll be well on your way to making a smart home purchase. A detailed inspection report can also serve as a roadmap for future maintenance, helping you preserve your home's value and comfort over time. Happy house hunting!
Understanding Mold Growth on Insulation Materials
By Gus Koedding April 23, 2025
Mold is a type of fungus that thrives in damp environments and reproduces by releasing spores into the air. These spores can lead to respiratory problems and other health issues when inhaled, especially in individuals with allergies or weakened immune systems. Mold growth on insulation is particularly concerning because it can compromise the material's effectiveness, leading to reduced energy efficiency and costly repairs. In addition to its health implications, mold can also damage the structural integrity of buildings. When mold grows unchecked, it can lead to the deterioration of building materials, which may result in expensive renovations and repairs. Therefore, understanding mold's nature and its impact on insulation is essential for maintaining a safe and efficient home or workplace. Why Mold Loves Insulation Insulation materials, especially those situated in damp or poorly ventilated areas, can become prime breeding grounds for mold. Conditions like high humidity, condensation, and water leaks create an ideal environment for mold to thrive. Insulation in basements, attics, and crawl spaces is particularly susceptible due to the frequent presence of these conditions. Furthermore, some types of insulation can trap moisture, exacerbating the problem. When insulation materials absorb moisture, they not only lose their insulating properties but also provide the damp environment mold needs to grow. This makes regular inspections and maintenance crucial in areas where insulation is exposed to potential moisture. Can Mold Grow on Insulation? The short answer is yes, mold can grow on insulation. However, the likelihood and severity depend on the type of insulation and the conditions it is exposed to. Mold growth isn't always immediately visible, making it important to understand the different ways mold can manifest on various insulation types. Types of Insulation and Mold Growth Fiberglass Insulation: Fiberglass itself is not organic, so it doesn't support mold growth. However, the paper backing often used can become moldy if it gets wet. In early stages, black mold on fiberglass insulation might look like small, dark spots. It's crucial to address any moisture issues promptly to prevent mold from spreading. Keywords: early stage black mold on fiberglass insulation, black mold on insulation paper. Foam Board Insulation: This type of insulation is less prone to mold because it doesn't absorb moisture. However, if the surface is dirty or dusty, mold can still grow on those particles. Regular cleaning and maintenance can help prevent mold growth on foam board insulation. Keywords: will mold grow on insulation, does insulation mold. Cellulose Insulation: Made from recycled paper, cellulose insulation is more susceptible to mold if it gets damp. This type of insulation needs to be treated with mold inhibitors to minimize the risk. It's important to ensure that cellulose insulation is installed in areas with adequate moisture control. Keywords: mold on insulation paper, can insulation get mold. Dirt vs. Mold on Insulation Sometimes, what appears to be mold might just be dirt. Mold usually has a fuzzy texture and can appear in colors like black, green, or white, often accompanied by a musty smell. Dirt, on the other hand, will appear more uniform and lack the fuzzy appearance. Understanding these differences can help you accurately identify mold problems and address them effectively. Recognizing Mold on Insulation Knowing what mold looks like on insulation can help you catch it early, preventing further damage and health risks. Mold may appear as dark, fuzzy patches or spots on the surface of the insulation, and it might be accompanied by a musty odor that can permeate the surrounding area. Early detection is key to preventing mold from spreading and causing more significant issues. Is Black Mold on Insulation Dangerous? Black mold, or Stachybotrys chartarum, is particularly hazardous to health. It can cause symptoms such as coughing, sneezing, and in severe cases, respiratory issues. Prolonged exposure to black mold can exacerbate these health problems, making it essential to address any suspected mold growth promptly. If you suspect black mold on insulation, it's best to consult a professional for mold remediation to ensure safe and effective removal. Preventing Mold Growth on Insulation Preventing mold is always easier and cheaper than dealing with it after it occurs. Here are some strategies to keep mold at bay: Control Moisture Fix Leaks: Ensure there are no water leaks from the roof, pipes, or other sources. Addressing leaks promptly can prevent moisture from reaching insulation materials. Improve Ventilation: Use fans and vents to reduce humidity levels, especially in attics and basements where air circulation may be limited. Use Dehumidifiers: In areas prone to dampness, dehumidifiers can keep moisture levels down, creating an environment less conducive to mold growth. Choose the Right Insulation Some insulation materials are more resistant to mold than others. Foam board and fiberglass without paper backing are good choices in areas prone to moisture. Selecting the appropriate insulation type for your specific environment can significantly reduce the risk of mold growth. Regular Inspections Regularly checking your insulation for signs of moisture or mold can help you catch problems before they escalate. Inspections should be more frequent in areas with known moisture issues or previous mold problems. Early detection can save time and money in the long run. Mold Remediation and Cleaning If you find mold on your insulation, you may need professional help. Mold remediation involves several critical steps to ensure effective removal and prevention of recurrence: Assessment: Identifying the source and extent of the mold. A thorough inspection can help determine the best course of action. Containment: Preventing the spread of mold spores. This step is crucial to protect unaffected areas of the home. Removal: Safely removing mold-infested materials. Professional removal ensures that mold is effectively eliminated without spreading spores. Cleaning: Using special cleaners to eliminate mold spores. This step helps prevent future mold growth by removing residual spores. Restoration: Replacing damaged insulation with new, clean material. Restoring the affected area ensures that your insulation system returns to its optimal efficiency. DIY Mold Cleanup For small areas, you might tackle mold on your own. Wear protective gear, use mold-killing products, and ensure the area is well-ventilated to prevent inhalation of mold spores. However, for extensive mold problems, professional intervention is advisable to ensure safe and comprehensive remediation. Conclusion Understanding whether insulation can mold, and what to do if it does, is essential for maintaining a healthy building environment. By choosing the right insulation materials, controlling moisture, and addressing any signs of mold promptly, you can protect your property and ensure a healthier space for everyone involved. Stay vigilant, and don't hesitate to seek expert advice if needed. With the right knowledge and proactive measures, you can keep mold at bay and maintain the efficiency and safety of your insulation. Regular maintenance and timely intervention are key to preventing mold-related issues and ensuring the longevity of your insulation system.
Finding Local Insulation Removal Services Easily
By Gus Koedding April 19, 2025
When it comes to maintaining a cozy and energy-efficient home, insulation plays a crucial role. Proper insulation helps regulate your home's temperature, keeping it warm in the winter and cool in the summer, thereby reducing energy costs. But what happens when that insulation gets old or damaged? That's where insulation removal services come in. Whether you're a building contractor, an HVAC technician, or a homeowner, understanding how to find local insulation removal services can make a significant difference in maintaining your home's efficiency and comfort. Let's dive into the basics and explore how you can easily find these services near you. Why Remove Insulation? Before we get into finding services, it's essential to understand why you might need to remove insulation. Over time, insulation can become less effective due to age, pest infestation, water damage, or even a previous installation that wasn't up to par. When insulation loses its efficiency, it fails to provide the thermal barrier necessary for energy conservation, leading to increased utility bills. Additionally, damaged insulation can harbor mold or pests, posing health risks to your household. Removing old insulation can help in improving the energy efficiency of your home, ensuring better indoor air quality, and preparing for new insulation that will better serve your needs. New insulation technologies offer improved performance, and by replacing old insulation, you can take advantage of these advancements. Moreover, removing and replacing insulation gives you the opportunity to inspect your home's structure for any hidden issues, such as leaks or structural damage, that might have gone unnoticed. What Are Insulation Removal Services? Insulation removal services specialize in safely and efficiently removing old or damaged insulation from homes and buildings. These professionals are equipped with the right tools and knowledge to handle various types of insulation, from fiberglass to blown-in insulation. The process involves specialized equipment like high-powered vacuums and protective gear to ensure safety and cleanliness during removal. They ensure the process is completed without spreading contaminants or fibers into the air, protecting both the workers and the home's occupants. This is particularly important as many types of insulation, such as fiberglass, can cause respiratory issues if inhaled. Moreover, these services often include disposal of old insulation materials, adhering to environmental regulations and ensuring that waste is handled responsibly. By hiring professionals, you can rest assured that the job is done thoroughly and in compliance with safety standards. How to Find Insulation Removal Services Near You Finding the right service provider doesn't have to be a daunting task. Here are some straightforward steps to guide you through the process: Search Online One of the easiest ways to find an insulation removal service is to search online. You can use keywords like "insulation removal service" or "insulation removal near me" to find local companies. Websites often provide details about the services offered, customer reviews, and contact information. Make sure to explore multiple websites to compare services and read testimonials to get a sense of customer satisfaction. Online platforms like Yelp or Angie's List can also be valuable resources for finding reliable service providers. These platforms not only list local businesses but also offer user-generated reviews and ratings, which can give you a clearer picture of the company's reputation and reliability. Consider reaching out to companies via their websites or social media platforms for additional inquiries or to request quotes. Check Local Directories Local directories or business listings can be a goldmine for finding reputable insulation removal companies. These directories often include ratings and reviews from past customers, giving you a good sense of the company's reliability and quality of work. Directories such as the Yellow Pages or local trade directories often categorize businesses by service type, making it easier to find specialized services like insulation removal. Don't overlook regional or community-focused directories, as they can sometimes feature smaller, highly-rated local businesses that might not appear in larger directories. These local companies may offer more personalized service and competitive pricing. Be sure to take note of any certifications or affiliations mentioned in the listings, as these can indicate a company's commitment to quality and professionalism. Ask for Recommendations Word of mouth is still a powerful tool. Ask friends, family, or colleagues if they have any recommendations for insulation removal services. Personal experiences can provide insights that you might not find online. These firsthand accounts can offer valuable information about the quality of service, pricing, and overall customer satisfaction. Additionally, consider reaching out to professionals in related fields, such as home inspectors or real estate agents, who may have worked with insulation removal companies before. They often have connections in the industry and can recommend reputable service providers. Remember to ask about both positive and negative experiences to get a well-rounded view of the companies being considered. Evaluate Multiple Quotes Once you've shortlisted a few companies, reach out to them for quotes. Comparing quotes from different providers can give you an idea of the average attic insulation removal cost and help you choose a service that fits your budget. When requesting quotes, ensure that each company provides a detailed breakdown of costs, including labor, materials, and any additional fees. Don't just focus on the price; consider the value offered. Look for companies that provide comprehensive services, such as cleanup and disposal, as part of their package. This can save you time and additional expenses. It's also wise to inquire about any guarantees or warranties they offer on their work, as this can provide peace of mind knowing that the service quality is assured. Verify Credentials When you've narrowed down your options, it's crucial to verify the credentials of the insulation removal company. Ensure they have the necessary licenses and insurance. This not only protects you but also ensures that the job will be done according to industry standards. Licensed companies are more likely to adhere to safety regulations and possess the expertise needed for effective insulation removal. Check if the company has any certifications from recognized industry organizations, as these can be indicators of their commitment to maintaining high service standards. Additionally, verify their insurance coverage to protect yourself from any liabilities in case of accidents or damage during the removal process. A reputable company will be transparent about their credentials and willing to provide proof upon request. What to Expect From an Insulation Removal Service When you hire a professional service, you can expect a systematic approach: Assessment: Initially, the company will assess the current state of your insulation. This includes identifying the type of insulation and the extent of any damage. They may use thermal imaging or other diagnostic tools to pinpoint problem areas, ensuring a thorough evaluation. Preparation: They will prepare the area to ensure that the removal process does not affect other parts of the home. This might include sealing off spaces and using proper ventilation to avoid contamination. Protective coverings may be applied to floors and furniture, and air filtration systems might be used to maintain air quality. Removal: The actual removal of insulation is done using specialized equipment that safely extracts the material without spreading dust or fibers. The team will wear protective gear to prevent exposure to any hazardous materials and will work efficiently to minimize disruption to your home. Cleanup: After removal, a thorough cleanup is conducted to ensure no remnants are left behind, leaving the space ready for new insulation. The cleanup process includes vacuuming and wiping down surfaces to remove any dust or debris, ensuring a clean and safe environment. Disposal: Proper disposal of the old insulation is crucial. The service provider will handle this in compliance with local regulations, ensuring environmentally responsible disposal. They may recycle materials whenever possible and will provide documentation of disposal for your records if needed. Practical Tips for Homeowners If you're a homeowner looking to remove insulation, here are a few practical tips: Know Your Insulation Type: Different insulation types may require different removal methods. Having this information handy will help in discussions with service providers. Understanding the type of insulation in your home, such as fiberglass, cellulose, or spray foam, can also aid in selecting the appropriate replacement material. Budget Considerations: While removing insulation, consider the cost of both removal and new installation. This helps in planning your budget effectively. Factor in potential additional costs, such as repairs to any damage uncovered during the process or upgrades to more efficient insulation types. Timing Matters: Schedule the removal during a time when it won't disrupt your daily activities. The process can take a few hours to a day, depending on the size of the job. Consider weather conditions as well, since extreme temperatures can affect both the removal process and your home's comfort during the transition. Prepare Your Home: Before the service begins, make necessary preparations such as clearing access to the attic or other areas where insulation will be removed. This will facilitate a smoother process and prevent any accidental damage to personal belongings. Conclusion Finding local insulation removal services doesn't have to be overwhelming. With a little research and some practical steps, you can find a reliable service that meets your needs. Whether you're preparing for a new insulation installation or addressing damage to your current insulation, professional removal services ensure the job is done safely and efficiently. With this guide in hand, you're well-equipped to make informed decisions about insulation removal, ensuring your home remains comfortable and energy-efficient. Remember, the right insulation not only saves on energy bills but also adds to the overall comfort and value of your home. By taking the time to select a reputable service provider, you can enjoy the benefits of improved air quality, enhanced energy efficiency, and peace of mind knowing your home is in excellent hands.
Understanding Attic Insulation Removal Expenses
By Gus Koedding April 15, 2025
Navigating the expenses involved in attic insulation removal can feel overwhelming, particularly if you're not familiar with the technicalities of thermal dynamics and insulation materials. However, there's no need to worry. We're here to simplify the process for you. This guide is tailored for building contractors seeking to make informed decisions about insulation materials and HVAC technicians aiming to optimize system performance. By the end, you'll have a clearer understanding of the costs involved in attic insulation removal and replacement, empowering you to handle your projects with confidence. What Factors Influence Insulation Removal Costs? When it comes to assessing the expenses associated with removing attic insulation, several critical factors come into play. Understanding these variables can significantly aid in estimating costs with greater accuracy, allowing for more precise budgeting and financial planning. Type of Insulation The type of insulation installed in your attic is a primary determinant of removal costs. Different insulation types present unique challenges and requirements: Blown-in Insulation: Often made from cellulose or fiberglass, this type is generally more affordable to remove. However, the process can be quite messy, requiring thorough cleanup to ensure no residual material is left behind. This type is popular due to its cost-effectiveness but demands careful handling to avoid the spread of particles. Spray Foam Insulation: Known for its superior sealing properties, spray foam insulation can pose more challenges during removal. Its adhesive nature often necessitates specialized handling, making it more costly. Removal usually involves cutting tools and protective gear, adding to the labor intensity and overall expense. Batt Insulation: Typically composed of fiberglass or mineral wool, batt insulation is often easier to remove. Despite this, costs can fluctuate based on how intricately the insulation is installed, particularly in attics with unusual shapes or obstructions that complicate the removal process. Size of the Attic The dimensions of your attic have a direct impact on removal costs. Insulation removal is frequently priced per square foot, meaning larger attics will naturally incur higher expenses. Understanding the average cost per square foot can be beneficial for creating a realistic budget. Larger spaces may also require more labor and time, influencing the overall cost. Condition of the Insulation The current state of your insulation is another key factor. If the insulation is damp, moldy, or infested with pests, additional precautions are necessary. Addressing these issues can increase both the complexity and cost of removal. Special treatments or disposal methods may be required to safely manage contaminated materials. Accessibility The ease with which workers can access your attic significantly affects the cost of insulation removal. Attics that are difficult to reach or have limited entry points may require additional labor and equipment, driving up expenses. Tight or awkward spaces may necessitate specialized tools or techniques to ensure safe and effective removal. How Much Does It Cost to Remove Attic Insulation? Understanding the potential costs of attic insulation removal is vital for planning and budgeting. While expenses can vary based on the aforementioned factors, having a general idea of the cost range can be beneficial. Blown-In Insulation Removal Cost Removing blown-in insulation typically costs between $1 and $2 per square foot. The price can fluctuate based on the material—fiberglass or cellulose—and the condition of the insulation. This type of removal often involves vacuuming equipment to effectively collect and dispose of the loose particles. Spray Foam Insulation Removal Cost Spray foam insulation removal is more complex and labor-intensive, with costs generally ranging from $3 to $5 per square foot. This higher cost is attributed to the need for specialized equipment and techniques to safely and effectively remove the foam without damaging the underlying structure. Average Cost to Remove and Replace Attic Insulation Overall, the average cost to both remove and replace attic insulation can fall between $1,500 and $4,000. This range is influenced by factors such as attic size, insulation type, and local labor rates. It's crucial to obtain detailed quotes from multiple contractors to ensure you're getting a fair price for the scope of work involved. Why Remove Old Insulation? The necessity of removing old insulation might not be immediately apparent, but it plays a crucial role in maintaining a safe and efficient home environment. Improved Energy Efficiency Old or damaged insulation can severely impact your home's energy efficiency, leading to elevated heating and cooling costs. By removing and replacing outdated insulation, you can ensure that your home maintains a consistent temperature, reducing energy consumption and lowering utility bills in the long run. This proactive approach not only improves comfort but also supports environmental sustainability. Health and Safety Old insulation can become a breeding ground for mold, mildew, and pests, posing significant health risks to inhabitants. Removing it is essential to eliminate these hazards and improve indoor air quality. This is particularly important for individuals with allergies or respiratory conditions, as contaminated insulation can exacerbate health issues. Enhanced Comfort New insulation offers superior temperature regulation, ensuring your home remains comfortable throughout the year. Additionally, modern insulation materials often provide better soundproofing, reducing noise pollution from outside and contributing to a more peaceful living environment. This added comfort can enhance overall well-being and quality of life. DIY vs. Professional Insulation Removal While the idea of tackling insulation removal as a DIY project may seem appealing, there are compelling reasons to consider professional assistance. Expertise and Safety Professionals possess the expertise required to handle insulation safely and effectively. They are trained in dealing with hazardous materials and ensure proper disposal, minimizing risks to both health and the environment. This expertise is crucial for maintaining safety standards and avoiding potential complications. Time and Efficiency Insulation removal can be a time-consuming endeavor, especially for those lacking experience. Professionals have the necessary tools and knowledge to complete the job efficiently, saving you time and effort. Their streamlined approach ensures that the project is completed quickly and accurately, reducing potential disruptions to your daily life. Comprehensive Service Hiring professionals provides the advantage of a comprehensive service, which includes removal, cleanup, and, if needed, replacement. This ensures that the job is done thoroughly and correctly, leaving you with peace of mind and a properly insulated home. A professional service can also provide valuable recommendations for improving your attic's insulation and overall energy efficiency. Conclusion Understanding attic insulation removal expenses doesn't have to be complicated. By taking into account factors such as insulation type, attic size, and accessibility, you can estimate costs more accurately and plan your budget effectively. While DIY efforts might seem tempting, opting for professional removal offers safety, efficiency, and the assurance of a job well done. Whether you're a building contractor aiming to provide optimal solutions for your clients or an HVAC technician seeking to enhance system performance, mastering the intricacies of insulation removal is essential. Equipped with this knowledge, you can make informed decisions that benefit both your projects and your customers, ensuring successful outcomes and satisfied clients. Now that you're well-versed in insulation removal costs, you're prepared to approach your next project with confidence. By making informed choices, you can enhance the efficiency and comfort of any space you work on. Happy insulating!
How to remove old insulation from attic
By Gus Koedding April 12, 2025
Removing old insulation from your attic might seem like a daunting task, but with the right tools and a little know-how, it can be a straightforward DIY project. Whether you're looking to improve your home's energy efficiency or simply upgrade to a better insulation material, this guide will walk you through the process of removing old attic insulation safely and effectively. Taking on this project yourself can save you money and give you the satisfaction of knowing you've improved your home's comfort and efficiency. However, it's important to approach this task with careful planning and preparation. The process involves potential exposure to hazardous materials and requires a methodical approach to ensure effectiveness and safety. By following this guide, you'll be well-equipped to tackle the job, understanding both the reasons for removing old insulation and the steps required to do so safely. Why Remove Old Insulation? Before diving into the "how," let's address the "why." Old insulation can lose its effectiveness over time due to factors like moisture, pests, and general wear and tear. When insulation becomes damp or compressed, its ability to insulate diminishes significantly, leading to higher energy bills and less comfort in your home. Moreover, insulation that has been compromised by pests can also become a health hazard, as it may harbor mold, bacteria, or other allergens. Furthermore, it might also contain harmful materials like asbestos if your home was built before the 1980s. Asbestos was commonly used in building materials for its fire-resistant properties but is now known to pose serious health risks when fibers are inhaled. Removing old insulation can improve air quality and pave the way for more efficient insulation solutions, ensuring a safer and more energy-efficient home environment. Additionally, upgrading to modern insulation materials can significantly enhance your home's thermal performance, reducing your heating and cooling costs. Safety First: Gear Up Before you start, ensure you have the right safety gear. Old insulation can be dusty and may contain irritants. Without proper protection, you could be exposed to harmful particles that can affect your respiratory system or cause skin irritation. Therefore, equipping yourself with the correct gear is an essential first step. Here's what you'll need: Gloves: Protect your hands from irritation. Choose thick, durable gloves that will prevent fibers from penetrating the material and reaching your skin. Dust mask or respirator: Prevents inhalation of dust and fibers. A respirator with a HEPA filter is ideal as it will filter out even the smallest particles. Safety goggles: Shields your eyes from debris. Opt for goggles that seal around your eyes to provide maximum protection. Long-sleeved clothing: Covers your skin to prevent irritation. Wear clothing that fits snugly to avoid catching on insulation or other materials, but is thick enough to keep fibers from reaching your skin. Types of Insulation and How to Remove Them Understanding the type of insulation in your attic is crucial, as different materials require different removal techniques. Proper identification will ensure that you handle the insulation safely and effectively. Fiberglass Insulation Fiberglass insulation is one of the most common types found in homes. It appears as batts or rolls and is relatively easy to remove. This type of insulation is known for its affordability and effectiveness in various climates, making it a popular choice for many homeowners. Start at One Corner: Begin in one corner of the attic and work your way across. This systematic approach ensures you cover every area without missing spots. Roll It Up: Gently roll up the fiberglass batts. Be careful not to compress the material, as this releases more fibers into the air. Take your time to handle the batts carefully, minimizing disturbance to the fibers. Bag It: Place the rolled-up insulation into heavy-duty garbage bags for disposal. Ensure the bags are tightly sealed to prevent fibers from escaping during transport. Blown-In (Loose Fill) Insulation This type of insulation, often made of cellulose or fiberglass, is trickier to remove because it's not in a contained form. Its loose nature means that it can easily spread throughout the attic, requiring a different approach for effective removal. Tools You'll Need: Insulation vacuum: You can rent one from a home improvement store. These powerful vacuums are specifically designed to handle loose-fill insulation. Large plastic bags: For collecting the vacuumed insulation. Make sure they are durable enough to hold the weight without tearing. Steps: Set Up the Vacuum: Follow the manufacturer's instructions to set up the vacuum. Ensure all connections are secure to prevent leaks. Start Vacuuming: Begin at one end of the attic, vacuuming the insulation into the hose. Move slowly and methodically to ensure all insulation is removed. Dispose Properly: As the vacuum bag fills, replace it with a new one and seal the filled bag tightly for disposal. Check with local regulations for the appropriate disposal methods for insulation materials. Asbestos Insulation If your home was built before the 1980s, there's a chance your insulation contains asbestos, a hazardous material. Asbestos poses significant health risks, and its removal requires specialized handling. If you suspect asbestos, do not attempt to remove it yourself. Hire a professional abatement company to handle the removal safely. These experts have the necessary equipment and expertise to manage asbestos-containing materials without risk to themselves or your household. Preparing Your Attic for New Insulation Once the old insulation is out, it's time to prepare the attic for new insulation. Proper preparation ensures that the new insulation will perform optimally, providing maximum energy efficiency and comfort. Clean the Space Sweep the Floor: Use a broom or vacuum to remove any remaining debris. This step ensures a clean surface for the new insulation to adhere to and prevents any old material from compromising the new installation. Check for Moisture: Inspect for signs of leaks or moisture damage. Address these issues before installing new insulation. Moisture can severely damage insulation and reduce its effectiveness, so repairing leaks is crucial. Seal Gaps and Cracks Caulking Gun: Use a caulking gun to seal gaps around windows, vents, and other openings. This step is vital for preventing drafts and improving the overall energy efficiency of your home. Foam Spray: For larger gaps, use expanding foam spray to seal the space. Foam spray expands to fill voids, providing a comprehensive seal against air leaks. Install Ventilation Proper ventilation is crucial to prevent moisture buildup and ensure the efficiency of your new insulation. Without adequate ventilation, moisture can accumulate, leading to mold growth and reduced insulation performance. Consider installing ridge vents or soffit vents if your attic lacks ventilation. These additions help maintain air circulation, keeping the attic dry and the insulation effective. Best Practices for New Insulation Installation Now that your attic is prepped, you can choose the right insulation for your needs. Selecting the appropriate type of insulation is key to achieving the desired energy efficiency and comfort levels in your home. Fiberglass Batts Fiberglass batts are easy to install and provide good thermal resistance. Measure your attic space and cut the batts to fit snugly between the joists. Ensure there are no gaps between the batts, as this can reduce their effectiveness. Blown-In Insulation Blown-in insulation is excellent for hard-to-reach areas and provides consistent coverage. Use a blower machine to evenly distribute the insulation across the attic floor. This type of insulation is ideal for attics with irregular shapes or obstructions that make batt installation challenging. Spray Foam Insulation For superior sealing and insulation, consider spray foam. This material expands to fill gaps, providing excellent energy efficiency. However, it's best installed by professionals due to its application complexity. Professional installation ensures the foam is applied evenly and effectively, avoiding common pitfalls such as uneven expansion or overspray. Proper Disposal of Old Insulation Once you've bagged the old insulation, check with your local waste management service for disposal guidelines. Some areas have specific regulations for disposing of insulation materials. Following these guidelines is important to ensure safe and environmentally responsible disposal. Improper disposal can lead to fines or environmental harm, so it's crucial to understand and adhere to local requirements. If you're unsure, contact your local waste management authority for assistance. Final Thoughts Removing old insulation from your attic is a manageable DIY task with the right preparation and safety precautions. By taking the time to remove and replace old insulation, you're investing in a more comfortable and energy-efficient home. Remember, if you ever feel uncertain or unsafe, don't hesitate to call in a professional. Expertise can prevent costly mistakes and ensure the job is done safely and effectively. Happy insulating!
Think you're overpaying on energy bills?
By Gus Koedding April 10, 2025
Several factors have contributed to the significant increase in power bills for Kootenai County residents in 2025:​ Avista's Basic Charge Increases: In 2022, Avista increased the basic charge from $7 to $15 (a 114% increase).​ In 2023, the charge rose from $15 to $20 (a 33% increase).​ In 2025, Avista proposed an additional 25% increase to $25 per month for both electricity and natural gas services These cumulative increases have substantially raised the fixed costs on customer bills. Rising Operational Costs: Avista has cited the need to fund nearly $1 billion in planned system investments for 2024 to maintain a safe and reliable electric system amid growing customer demand. Transition to Clean Energy: Legislation such as Washington's 100% clean energy bill requires utilities to eliminate coal-fired power by December 31, 2025, and achieve greenhouse-gas-neutral sources by 2030. This transition necessitates significant infrastructure investments, contributing to higher costs for consumers. Increased Energy Demand: Economic growth and the addition of large energy consumers have led to higher overall energy consumption. Avista's 2025 Integrated Resource Plan forecasts a 4.5% increase in loads by 2026 compared to 2023 levels, necessitating further investments in energy infrastructure. Collectively, these factors have resulted in higher power bills for residents in Kootenai County in 2025.#Insulation#EnergyEfficiency#Rebates#SaveEnergy#ReduceBills#InsulationRebates#EcoSavings#InsulationUpgrade#EnergySavings
By Gus Koedding April 9, 2025
Hey there! Let's dive into the world of attic mold and why it's more than just an eyesore. Mold in your attic can be a sneaky troublemaker, leading to potential health risks and structural issues if not dealt with properly. Whether you're a building contractor or an HVAC technician, understanding the dangers of attic mold and how to address it can be crucial. Let's break it down! What is Attic Mold? Attic mold is basically a type of fungi that grows in your attic when there's excess moisture. This can happen due to a variety of reasons like leaks, poor insulation, or inadequate ventilation. Mold loves damp, dark, and warm spaces -- and attics often fit that bill perfectly. These fungi thrive on materials such as wood, paper, and fabric, making your attic's structure an ideal breeding ground. The spores can travel through air currents, spreading rapidly if conditions are favorable. Mold can start to grow in as little as 24 to 48 hours in the right environment, which is why it's essential to address moisture issues promptly. Why is Mold in the Attic Dangerous? Health Risks Mold isn't just ugly -- it can be a health hazard. Breathing in mold spores can lead to respiratory issues, especially for those with allergies, asthma, or weakened immune systems. Symptoms can range from coughing and sneezing to more severe reactions like difficulty breathing and chest tightness. Prolonged exposure to mold can exacerbate chronic health conditions and even lead to new health concerns. People living in homes with mold may experience persistent fatigue, headaches, and irritation of the eyes, skin, nose, and throat. In severe cases, mold exposure can contribute to the development of lung infections, particularly in those with compromised immune defenses. Structural Damage Aside from health risks, mold can also wreak havoc on your home's structure. It can weaken wood, damage insulation, and even spread to other parts of your house if not contained. This can lead to costly repairs and a decline in property value. Mold can also compromise the integrity of your attic's framework, leading to potential safety hazards. Over time, mold can cause wood rot, resulting in sagging ceilings or weakened beams that may require extensive repairs or replacement. If left unchecked, mold growth can spread to drywall and other materials, further escalating repair costs and reducing the longevity of your home. How to Spot Mold in Your Attic So, how do you know if you have mold in your attic? Here are some signs to look out for: Musty Smell: If your attic smells earthy or damp, it might be mold. This distinctive odor is often one of the first indicators of mold presence, even before visible signs appear. Stains and Discoloration: Look for black, green, or white spots on wood or insulation. Mold may appear as fuzzy patches or slimy textures, depending on the type and severity of the infestation. Water Leaks: Check for signs of water damage, as mold often follows leaks. Stains, peeling paint, or warped wood are red flags that moisture has infiltrated your attic space. Regular attic mold inspections can help catch these issues early before they become big problems. Utilizing a flashlight or moisture meter can aid in identifying hidden mold growth in corners and behind insulation. Effective Ways to Kill Mold in Attic If you've spotted mold, don't panic! There are several ways to tackle this problem. DIY Mold Treatment For small areas, you might be able to handle the mold yourself. Here's a simple method to try: Protect Yourself: Wear gloves, a mask, and goggles. Personal protective equipment is crucial to prevent inhaling spores or coming into direct contact with mold. Ventilate: Open windows and use fans to circulate air. Proper ventilation helps reduce humidity levels and discourages further mold growth. Clean: Use a mixture of water and detergent to scrub the moldy area. Let it dry completely. A soft brush can help remove mold without damaging surfaces. Disinfect: Apply a mold-killing solution, like vinegar or a commercial cleaner, to prevent regrowth. Be thorough and ensure the area is well-dried to avoid residual moisture. Professional Mold Remediation For larger infestations or if you're unsure about tackling the mold yourself, hiring a professional attic mold remediation service is the way to go. They have the tools and expertise to safely and effectively remove mold and treat the area to prevent future growth. Professionals can assess the extent of mold contamination and identify underlying moisture problems. They use specialized equipment like HEPA vacuums and air scrubbers to ensure thorough cleaning and containment. Their expertise can also guide you in implementing long-term solutions to prevent mold recurrence. Preventing Mold in the Attic Prevention is key when it comes to mold. Here's how to keep your attic mold-free: Improve Ventilation Ensure your attic is well-ventilated to prevent moisture buildup. This might mean adding vents or fans to increase airflow. Good ventilation helps maintain a consistent temperature and reduces humidity levels, creating an environment less conducive to mold growth. Consider installing a ridge vent or gable vents to enhance natural airflow. Attic fans can also be beneficial in more humid climates, providing mechanical assistance in expelling moist air. Fix Leaks and Seal Cracks Regularly check for leaks in the roof and seal any cracks to keep water out. This is especially important after storms or heavy rain. Promptly repairing damaged shingles or flashing can prevent water from seeping into the attic. Inspect the attic for signs of condensation, which can indicate inadequate sealing or insulation. Addressing these issues can significantly reduce moisture and the likelihood of mold growth. Insulation Matters Proper insulation can help maintain a stable temperature in your attic, reducing the likelihood of condensation and mold growth. Consider consulting with an insulation expert to find the best materials for your space. High-quality insulation not only keeps your attic dry but also improves energy efficiency, lowering heating and cooling costs. Evaluate your current insulation's R-value and consider upgrading to more resistant materials if necessary. Regular Inspections Make attic mold inspection a routine task. Catching mold early can save you a lot of headaches (and money) down the road. Schedule seasonal inspections, especially before and after extreme weather conditions, to ensure your attic remains mold-free. Using technology like infrared cameras can help detect hidden moisture and potential mold growth areas, providing a proactive approach to mold prevention. Finding Attic Mold Removal Companies Near Me If you need professional help, searching for "attic mold removal companies near me" or "attic mold remediation services" is a great place to start. Look for companies with good reviews and experience in mold remediation to ensure a job well done. Check for certifications from industry organizations like the Institute of Inspection, Cleaning and Restoration Certification (IICRC) to ensure the company adheres to industry standards. Request quotes from multiple companies to compare services and pricing, ensuring you receive quality service at a fair price. Final Thoughts Attic mold might seem like a minor inconvenience, but it can lead to significant health and structural issues if not addressed. By understanding the risks and taking proactive steps to prevent and treat mold, you can keep your attic -- and your home -- safe and sound. Remember, whether you're a contractor ensuring the best materials for insulation or an HVAC technician optimizing ventilation, your knowledge and actions can make a big difference. Stay mold-aware and keep your spaces healthy! Attic maintenance is an ongoing responsibility that pays dividends in preserving your home's integrity and your family's health. Let's keep those attics fresh and mold-free, ensuring they remain a safe haven and valuable space in your home.
Understanding Attic Relative Humidity Levels
By Gus Koedding April 8, 2025
Understanding the dynamics of attic relative humidity is crucial for building contractors and HVAC technicians. It's not just about maintaining a comfortable indoor environment. The implications go beyond comfort. Attic humidity levels can significantly impact the integrity of a building and the efficiency of HVAC systems. High humidity in the attic can lead to mold growth, including hazardous black mold. This poses health risks to occupants and can damage the building structure. On the other hand, proper attic insulation plays a pivotal role in managing humidity levels. It helps maintain a stable temperature, reducing the potential for condensation and mold growth. This article aims to provide a comprehensive understanding of attic relative humidity. It will delve into the principles of thermal dynamics, the role of insulation, and practical strategies for humidity control. By the end, you'll be equipped with the knowledge to make informed decisions in your construction or HVAC projects, ensuring energy efficiency and occupant comfort. The Importance of Attic Relative Humidity Attic relative humidity is a crucial aspect of building health and efficiency. When humidity levels are high, the potential for mold development increases. Mold not only affects the aesthetic appeal of a home but also poses serious health risks. Efficient attic insulation contributes to managing humidity levels. By preventing temperature fluctuations, insulation minimizes the chances of condensation within the attic space. This helps to maintain the building’s structural integrity and prevents degradation over time. Moreover, understanding attic relative humidity can lead to significant cost savings. Proper management helps reduce the load on HVAC systems, leading to lower energy bills. Efficient systems can extend the lifespan of HVAC equipment, providing additional financial benefits. Contractors and HVAC technicians who grasp this concept can achieve better results in their projects. They can offer enhanced comfort to clients, ensuring satisfaction and repeat business. It's clear that maintaining appropriate attic humidity is a wise investment for any building professional. How Attic Humidity Affects Building Integrity Attic humidity plays a vital role in the longevity of a building. Excessive moisture can weaken crucial structural components. Over time, this leads to problems that may compromise the safety and stability of the structure. High attic humidity creates an ideal environment for mold growth. Mold can proliferate quickly, spreading throughout the attic and beyond. This not only damages materials but also undermines the building’s overall integrity. Inadequate control of humidity can cause insulation materials to become less effective. Moisture-logged insulation loses its thermal resistance, leading to increased energy consumption. This can result in higher heating and cooling costs for property owners. Moreover, excessive humidity can cause wood structures to warp or rot. This deterioration weakens beams and supports, posing a potential safety hazard. Regular monitoring and controlling of attic humidity levels are critical to prevent costly repairs. Mold Growth and Health Risks Mold growth is a common byproduct of excessive attic humidity. Mold loves damp, dark conditions, making attics a prime location for spores to thrive. Once established, mold can be tricky to remove. The presence of mold poses several health risks. Exposure can lead to respiratory problems, especially for individuals with allergies or asthma. Some molds, like black mold, can produce toxins that are particularly hazardous. Key health risks associated with mold include: Respiratory irritation and allergies Asthma attacks or other breathing difficulties Skin and eye irritation Controlling humidity can mitigate these health issues. Reducing moisture levels prevents mold from growing in the first place. Implementing effective humidity control strategies is crucial to maintaining a healthy indoor environment. Structural Damage and Insulation Deterioration Excessive humidity impacts both the structural components and insulation in attics. When wood absorbs too much moisture, it can begin to warp or rot. Rotting wood jeopardizes the structural integrity of a building, necessitating potentially expensive repairs. Insulation materials are also at risk. Moisture decreases insulation's effectiveness by reducing its R-value. Lower R-values mean more heat escapes during winter and enters in summer, leading to inefficient energy use. Key potential damages from high humidity include: Warped or rotted wood structures Damaged or ineffective insulation Increased energy consumption and costs Regular inspections can catch these issues early. Mitigating humidity problems prevents deterioration and extends the lifespan of building materials. Properly managing attic humidity is essential for the overall health and efficiency of any structure. Principles of Thermal Dynamics in Attic Spaces Understanding thermal dynamics is crucial for managing attic conditions. These principles dictate how heat moves within spaces. Knowing these can assist in selecting proper insulation and ventilation strategies. Heat transfer occurs in three ways: conduction, convection, and radiation. Each mode impacts how temperature and humidity levels are controlled. Grasping these concepts enables better decision-making for attic management. Proper insulation is vital in minimizing undesirable heat transfer. Insulation slows heat flow, maintaining stable temperatures. This results in a more energy-efficient home and a healthier attic environment. By utilizing knowledge of thermal dynamics, professionals can effectively manage attic climates. This reduces issues like excessive humidity and associated mold problems. It also extends the life of attic structures and insulation materials. Conduction, Convection, and Radiation Conduction involves heat transfer through solid materials. In attics, this occurs when heat passes through walls, floors, or roofs. Effective insulation reduces conduction by providing resistance to this heat flow. Convection is the process of heat transfer through fluids such as air. In attic spaces, convection affects how warm air rises and cool air sinks. Ventilation systems help control convection, maintaining more consistent temperatures. Radiation involves heat transfer through electromagnetic waves. Sunlight entering through the roof adds heat via radiation. Reflective barriers can minimize this effect, particularly during hotter months. Understanding these processes helps in selecting the best materials and ventilation techniques. Properly managing these heat transfer methods can significantly reduce energy expenses. It also prevents excessive attic humidity, promoting a healthier environment. The Role of Insulation Materials Insulation materials play a crucial role in managing attic temperatures and moisture. Different materials vary in their effectiveness and suitability. Choosing the right insulation can make a significant difference. Insulation works by reducing heat conduction and slowing down heat flow. This keeps indoor spaces warmer in winter and cooler in summer. A higher R-value indicates better insulation performance, enhancing energy efficiency. Key insulation materials include: Fiberglass : Known for its affordability and effectiveness in various climates. Cellulose : Made from recycled paper, provides good thermal and sound insulation. Foam Board : Offers high insulation value with moisture resistance. Spray Foam : Expands to fill gaps, providing excellent air sealing and insulation. Selecting the right insulation depends on factors like climate, budget, and specific attic conditions. It's vital to consider both thermal performance and moisture resistance. Proper insulation choice supports a balanced attic environment, optimizing comfort and energy use. Strategies for Controlling Attic Humidity Controlling attic humidity is crucial for maintaining a safe and efficient environment. High humidity can lead to mold growth and structural issues. Proper strategies can prevent these problems and ensure long-term attic health. Effective ventilation is one of the most straightforward solutions. It facilitates air exchange, removing excess moisture. Options range from passive vents to more advanced active systems that regulate airflow. Adding vapor barriers can help block moisture from rising into the attic. These barriers are typically installed during construction or major renovations. They are a crucial line of defense against humidity-related issues. Sealing air leaks is another vital strategy. Gaps in the attic floor or roof can let warm, moist air seep into the space. By sealing these gaps, you can significantly reduce humidity levels and related risks. Ventilation Solutions Ventilation plays a key role in managing attic humidity. It enables air circulation, preventing moisture buildup. Properly ventilated attics are less prone to mold growth and insulation deterioration. Different options exist depending on the attic’s design and local climate. Passive ventilation uses natural airflow, requiring no mechanical parts. It includes options like ridge vents and soffit vents that encourage air movement. For more robust control, active ventilation solutions can be used. These include mechanical systems like fans that forcefully remove warm, moist air. Active systems can be automated to maintain optimal conditions consistently. When selecting ventilation solutions, consider the following options: Ridge Vents : Allow warm air to escape naturally from the peak of the roof. Soffit Vents : Facilitate cool air entering beneath the roof eaves. Attic Fans : Actively draw out hot air, providing effective moisture control. Matching the right ventilation solution to your attic’s needs can greatly reduce humidity issues. This ensures structural integrity and improves the efficiency of HVAC systems. Vapor Barriers and Sealing Leaks Vapor barriers are essential for controlling attic humidity. They block moisture from permeating through the floors and walls. Implementing them correctly can protect against many humidity-related problems. Vapor barriers are often made of plastic or foil sheets. These materials are installed beneath the attic insulation. They effectively prevent moisture from rising into the attic space, reducing the risk of mold growth. In addition to vapor barriers, sealing leaks is critical. Warm air from the living space often seeps into the attic. This can occur around plumbing vents, electrical fixtures, or small gaps in the attic structure. To ensure an airtight seal, inspect these areas and apply caulk or weatherstripping where needed. Addressing leaks can dramatically lower humidity levels in the attic, promoting a healthier and more energy-efficient environment. When managing attic humidity, consider the following strategies: Install Vapor Barriers : Use plastic or foil sheets to block moisture. Seal Air Leaks : Inspect and seal gaps around fixtures and vents. Insulation Overhaul : Update insulation to include moisture-resistant materials. By integrating vapor barriers and sealing leaks into your moisture control strategy, you can effectively manage attic humidity levels. This proactive approach aids in preventing costly mold remediation and structural repairs down the line. Impact of Attic Conditions on HVAC Systems Attic conditions significantly impact HVAC system performance. High attic humidity can strain these systems, leading to inefficiencies. Poor insulation and ventilation exacerbate this issue, causing systems to work harder. Increased humidity can lead to HVAC components deteriorating faster. Moisture promotes rust and electrical issues in vital parts. This shortens system lifespan, leading to more frequent repairs and replacements. Proper attic insulation and humidity control can alleviate these problems. By stabilizing attic conditions, HVAC systems operate more efficiently. This leads to less wear and tear, thus reducing maintenance costs and extending equipment life. Energy Consumption and System Efficiency When attic conditions are optimal, energy consumption decreases. Lower humidity helps HVAC systems run smoothly, conserving energy. Conversely, high humidity forces systems to consume more energy, increasing utility bills. Efficient HVAC operation also depends on how well attic insulation is maintained. Proper insulation keeps warm, moist air from affecting HVAC performance. This enhances the system’s ability to regulate indoor temperatures effectively. To optimize energy efficiency, consider these points: Upgrade Insulation : Ensure it meets or exceeds current standards. Maintain Proper Humidity : Use dehumidifiers to keep moisture levels balanced. Regular HVAC Maintenance : Inspect for wear and potential moisture damage. By addressing these factors, you can boost energy savings and improve HVAC performance. This ensures better indoor comfort and extends the lifespan of heating and cooling systems. Mold Remediation in Attics Mold in attics is a common concern that requires urgent attention. High relative humidity creates favorable conditions for mold growth. This can lead to potential health risks and structural damage. Addressing mold effectively involves more than just surface cleaning. It is crucial to identify and eliminate the root causes, such as moisture intrusion. Proper ventilation and attic insulation are essential in preventing mold. Professional mold remediation is often necessary for thorough treatment. Experts can assess the situation, remove affected materials, and implement long-term prevention strategies. This ensures that mold issues are resolved efficiently and comprehensively. Identifying and Addressing Mold Issues Identifying mold early can save significant costs and health risks. Look for visible signs such as discoloration and musty odors. These indicators suggest that further investigation is needed. Moisture is the main cause behind mold problems. Thus, addressing it requires a targeted approach. Here are actionable steps: Inspect for Leaks : Check roofing and plumbing for any signs of leaks. Evaluate Humidity Levels : Use hygrometers to monitor and adjust moisture levels. Enhance Ventilation : Ensure that attic ventilation meets the necessary standards. Once mold is identified, it's vital to address it swiftly. Remove and dispose of contaminated materials safely. Proper cleaning of affected areas prevents mold from recurring. Implementing these strategies can safeguard your attic from future mold problems. Monitoring and Maintenance for Optimal Humidity Levels Maintaining ideal humidity levels in your attic is crucial for avoiding mold and structural issues. Consistent monitoring allows for early detection of problems. Employing regular maintenance practices ensures long-term efficiency. Proactive measures in the attic can prevent high humidity from causing significant damage. This involves a combination of technology and manual inspections. Together, these approaches help maintain an optimal environment. Implementing a comprehensive maintenance plan is essential. Focusing on effective monitoring tools and preventive measures can lead to reduced energy consumption. Ultimately, this enhances the longevity of the building. Tools and Techniques for Humidity Monitoring Several tools are available to keep tabs on attic humidity. Digital hygrometers are highly effective in providing precise readings. These devices can be placed in various attic locations to track moisture levels. Homeowners and professionals can also consider smart sensors. These devices provide continuous monitoring and can be integrated into home automation systems. Alerts can be set up to notify you if humidity levels exceed desired thresholds. Leverage these tools to stay informed about attic conditions: Digital Hygrometers : Easy to use and display current humidity levels. Smart Sensors : Offer remote access and alerts for better control. Thermal Imaging Cameras : Identify moisture areas visually. Using the right tools helps maintain suitable conditions in the attic year-round. Regular Inspections and Preventative Measures Routine inspections are necessary to maintain an attic's health. Regular checks can pinpoint ventilation problems or insulation issues. Addressing these promptly prevents bigger complications like mold growth. Attic care involves more than just monitoring. Effective preventative measures should be part of your maintenance routine. Key areas to focus on include sealing leaks and ensuring insulation is intact. Develop a habit of performing these checks and actions: Inspect Insulation : Verify if it's dry and properly installed. Check for Leaks : Examine the roof and attic floor for water signs. Clear Ventilation Paths : Ensure vents are unobstructed for optimum airflow. Commit to regular inspections and adopt these measures. They will protect your attic and support the building's integrity over time. Conclusion: The Balance of Insulation and Ventilation Achieving the right balance of insulation and ventilation is fundamental for controlling attic humidity. Proper insulation reduces heat transfer while effective ventilation manages moisture levels. Together, these elements form the cornerstone of attic health. By understanding and applying thermal dynamics, building professionals can significantly enhance energy efficiency. This balance not only protects against mold and structural problems but also extends the life of HVAC systems. Through continuous learning and application of best practices, both building contractors and HVAC technicians can ensure optimal attic conditions, leading to improved comfort and sustainability in residential and commercial spaces.
Why Low Attic Insulation Could Be Harming Your Home More Than You Think
By Gus Koedding April 6, 2025
Your attic might be "out of sight, out of mind"—but poor insulation up there can lead to some serious (and sneaky) problems. Here's why it matters 👇 🌬️ 1. Moisture Builds Up Fast Warm air from inside your home rises into the attic. Without proper insulation, it meets cold surfaces and condenses—leading to water droplets that soak into wood and insulation. Hello, mold. 👋 💧 2. Your Attic Becomes a Humidity Trap No insulation = no barrier. That lets humid air escape from your living space and settle into the attic, raising moisture levels and creating a breeding ground for mildew and decay. 🍄 3. Mold and Mildew Love It Dark, damp, and warm? That’s mold’s dream home. Once it starts growing, it can spread quickly and ruin wood, drywall, and your indoor air quality. ❄️ 4. Ice Dams in Winter = Leaky Roofs In colder climates, escaping heat melts snow on your roof. It refreezes at the edges, causing ice dams—and water backs up under shingles, leaking into the attic. ⚡ 5. You Pay More on Energy Bills Humidity affects your HVAC efficiency. Systems in the attic have to work harder, which means you’re paying more to stay comfortable. ✅ What You Can Do: Boost your attic insulation (think fiberglass or blown-in cellulose). Seal off air leaks. Make sure your attic has proper ventilation. Add vapor barriers where needed. A well-insulated attic = a healthier, drier, and more energy-efficient home. 🏡💸 Got questions about insulation? Drop them below or send us a message—we’re here to help!
How to test for mold in house
By Gus Koedding April 5, 2025
Mold is a silent intruder. It creeps into our homes, thriving in damp, warm, and poorly ventilated environments. Often, it's only when we see the telltale signs - a musty odor, discolored patches on walls, or even health symptoms like allergies - that we realize we have a problem. But by then, the damage may already be done. Mold can cause structural damage to buildings and pose serious health risks to occupants. It's a problem that building contractors and HVAC technicians face regularly. Understanding the principles of thermal dynamics and insulation can help in detecting and preventing mold. These principles influence the conditions that mold needs to grow, such as moisture and temperature. This guide aims to provide a comprehensive understanding of mold testing methods. It's designed to help you detect mold in your house or in the buildings you work on. We'll delve into the science behind mold growth, discuss the signs to look out for, and explore various mold testing methods. By the end of this guide, you'll be equipped with the knowledge to choose the right insulation materials, optimize HVAC systems, and ensure a mold-free environment for your clients. Understanding Mold and Its Implications Mold is more than just an eyesore. It's a living organism that can quietly wreak havoc if not properly managed. To tackle mold effectively, one must first grasp its nature. Mold thrives in environments that provide warmth, moisture, and food sources, such as drywall or wood. A simple leak or high humidity can create the perfect conditions for mold growth. Therefore, understanding how these elements interact is crucial. The Science of Mold Growth Mold spores are everywhere, floating invisibly in the air. They're microscopic and remain dormant until they encounter the right conditions. Moisture is the most vital factor in mold growth. When coupled with warm temperatures, mold can proliferate rapidly. In the construction industry, this knowledge is vital. Contractors and HVAC technicians need to control the environment to prevent mold growth. Thermal dynamics plays a role by influencing how heat and moisture move through spaces. Understanding these dynamics helps in selecting appropriate materials and construction methods to thwart mold. Health and Structural Risks of Mold Mold does not only tarnish walls. It poses significant health risks, especially to those with allergies or respiratory conditions. Exposure to mold can cause symptoms like sneezing, coughing, and even asthma attacks. Furthermore, it can compromise the immune system in severe cases. Structurally, mold compromises the integrity of buildings. It can cause materials to break down, resulting in expensive damage. Detecting mold early is critical to prevent costly repairs. In addition to health concerns, the impact on buildings can affect their value. Mold-infested homes are less appealing to buyers, often requiring costly remediation before sale. By understanding mold’s growth and effects, professionals can take informed steps to combat and prevent mold in buildings. Recognizing Signs of Mold in Your Home Being able to identify mold early can save homeowners from extensive issues. Not all signs of mold are overt; some require a keen eye and awareness. Recognizing mold involves observing both visual and subtle clues within a home environment. These signs can vary, depending on the location and severity of the infestation. Visible Indicators and Early Signs of Mold Visible mold is the easiest to detect. Look for dark spots on walls, ceilings, or under sinks. These spots can appear in a variety of colors—black, green, or even orange and pink. Besides visual signs, a persistent musty odor often indicates mold presence. Pay attention to peeling paint or wallpaper. These could be early indicators of moisture issues that typically lead to mold. Addressing these signs promptly is key to prevention. Hidden Mold: What to Look For Not all mold is evident at first glance. Mold can conceal itself within walls or below floorboards. Warped walls or floors are potential signs of hidden moisture and subsequent mold growth. Hearing a change in air quality, like increased humidity, could also hint at mold. For more elusive mold, professionals can employ specialized tools. Moisture meters and infrared cameras can detect problems behind surfaces. Regular inspections and monitoring can avert hidden mold issues. Tools like borescopes can explore behind walls, revealing hidden mold clusters without significant disruption to structures. Understanding the areas prone to hidden mold can lead to more effective management. Collectively, these methods can provide a clearer picture of mold presence in a home. By knowing what to look for, professionals can ensure timely remediation and prevention strategies. Mold Testing Methods Explained Detecting mold reliably requires employing various testing methods. Each method serves specific needs and conditions, complementing the overall detection process. Visual Inspections and Initial Assessments Visual inspections are the starting point for mold detection. They involve checking typical mold-prone areas, such as basements and bathrooms. Using a flashlight to scan for discoloration and water stains can be very effective. Homeowners can carry out these assessments or hire professionals for more thorough inspections. DIY Mold Testing Kits Do-it-yourself mold testing kits are popular for their convenience and affordability. They involve collecting samples and sending them to a lab for analysis. Here's how to use them: · Select the area : Choose suspected mold spots for sampling. · Collect the sample : Follow the kit's instructions for accurate sample collection. · Send for analysis : Mail the sample to the designated lab for results. These kits provide basic insights but may lack detailed data provided by professionals. Professional Mold Inspection Techniques For more precision, consider professional mold inspections. Experts use sophisticated equipment to identify mold issues deeply embedded in structures. They conduct air sampling, which evaluates the concentration of mold spores in the air, providing a clear indication of mold presence. Surface sampling involves swabbing surfaces to analyze specific mold growths. Another technique used by professionals is bulk sampling, where materials are removed for close analysis in a lab setting. Culture tests are also performed to understand mold varieties and their potential impact. Here are some professional techniques: · Air sampling : Detects mold spores in the air. · Surface swabbing : Tests for types of mold present on surfaces. · Bulk material removal : Analyzes removed materials for mold. · Culture tests : Examines mold's growth potential and strain types. Such comprehensive methods can accurately diagnose mold issues and help in formulating effective remediation strategies. Working with certified professionals offers the advantage of extensive knowledge and advanced tools. Advanced Mold Detection Tools Advanced mold detection requires specialized tools to identify hidden problems. These technologies provide accuracy and depth in analysis. Moisture Meters and Infrared Cameras Moisture meters are essential for detecting hidden dampness. They can measure moisture content in materials like drywall and wood. By doing so, they help pinpoint areas that are at risk for mold growth. Mold can thrive unnoticed in damp conditions, making moisture meters invaluable for early detection. Infrared cameras, on the other hand, visualize temperature differences across surfaces. They can reveal hidden moisture behind walls and ceilings by detecting cold spots resulting from moisture accumulation. This thermal imaging allows for non-invasive exploration, reducing the need for destructive inspections. Together, moisture meters and infrared cameras provide a reliable method for detecting moisture-related issues without disrupting the environment. Air, Surface, and Bulk Sampling Methods Sampling methods offer deeper insights into mold presence and concentration. Each method is tailored to capture different data types for analysis. Air sampling involves collecting air samples to determine mold spore levels in the indoor environment. This data helps assess the extent of mold contamination in the air. Surface sampling gathers samples from surfaces using swabs or tapes. The samples undergo lab analysis to identify mold strains and their characteristics. Lastly, bulk sampling entails removing chunks of materials from suspect areas. These are examined in labs to assess mold penetration and content. Here are common sampling methods: · Air sampling : Captures spores from the air. · Surface sampling : Analyzes mold from surfaces. · Bulk sampling : Tests material integrity and mold penetration. Using these advanced tools and methods in tandem provides a comprehensive understanding of mold issues, allowing for targeted remediation strategies. The Role of Thermal Dynamics and Insulation in Mold Prevention Thermal dynamics significantly impact mold growth in buildings. Heat transfer through walls influences moisture levels. Temperature fluctuations can lead to condensation. Condensation is moisture-rich and encourages mold growth. Effective insulation is key to preventing such moisture problems. Insulation improves thermal regulation, reducing condensation risks. Proper insulation is crucial for maintaining a consistent indoor climate. Consistency minimizes wet areas where mold can thrive. Different types of insulation offer varying resistance to heat flow. Choice and application of insulation affect thermal dynamics and mold prevention. Quality installation ensures insulation effectiveness. Moreover, gaps in insulation can create thermal bridges. These bridges are pathways for heat and moisture, fostering mold growth. Properly identifying and addressing these can mitigate mold risks. How Insulation Affects Moisture and Mold Growth Insulation acts as a barrier, impacting humidity and air movement. By reducing heat loss, insulation stabilizes indoor humidity levels. This stability minimizes moisture build-up. High humidity often leads to mold, so control is vital. Insulation methods that provide a vapor barrier are effective against moisture. They limit vapor diffusion, deterring mold growth. Different insulation materials have varying efficiencies. Selecting the right material is crucial for the intended environment. Choice impacts thermal performance and mold resistance. Poor insulation, or improper installation, can cause cold spots. Cold spots often result in localized condensation, a haven for mold. Thus, installing insulation correctly is essential. HVAC Systems and Mold: Maintenance and Best Practices HVAC systems play a vital role in managing indoor climate. Maintenance and efficiency of these systems prevent mold-friendly conditions. Consistent airflow and balanced humidity are key. Regular checks of HVAC components are necessary. Clean filters and ducts promote optimal air quality. This reduces moisture and potential mold growth. Best practices include: · Routine maintenance to ensure efficient operation. · Filter replacements to maintain clean air supply. · Humidity controls to keep levels below mold-supportive conditions. Additionally, ductwork should be well-sealed. Leaks can lead to condensation and mold in hidden areas. Preventive measures in HVAC systems are invaluable for mold control. Remediation and Prevention: Ensuring a Mold-Free Environment Mold remediation involves more than just cleaning affected areas. It's crucial to address the root causes to prevent recurrence. Identifying and fixing moisture sources is vital. A comprehensive approach includes improving ventilation and controlling humidity. Regular inspections and maintenance are crucial for early detection. These steps can prevent long-term damage and health issues. Prevention strategies should incorporate mold-resistant materials. Using these materials in prone areas can greatly reduce mold risks. It's important to consider construction methods that deter moisture accumulation. To maintain a mold-free environment, homeowners and professionals can follow key practices: · Regularly inspect and maintain roofs and plumbing. · Ensure proper drainage around the building's foundation. · Use dehumidifiers in damp-prone areas. Addressing the Source: Fixing Moisture Problems Moisture is the primary factor in mold development. To combat mold, one must first eliminate moisture problems. This involves both identifying leaks and ensuring proper drainage. Repairs should focus on common moisture intrusions like leaky roofs and burst pipes. Ensuring that water is appropriately diverted away from your property is also crucial. Prompt attention to such issues is essential to hinder mold growth. Mold-Resistant Materials and Construction Techniques Incorporating mold-resistant materials can significantly reduce mold risks. These materials are designed to withstand humidity better than standard options. Builders should prioritize their use in high-moisture areas. Innovative construction techniques can also help prevent mold. Consider features like sloped surfaces and vented wall systems. Such designs enhance water runoff and air circulation, reducing mold susceptibility. Key techniques and materials include: · Mold-resistant drywall and paints for high-humidity areas. · Properly installed vapor barriers to restrict moisture penetration. · Use of treated wood to resist mold in construction. Conclusion: The Importance of Regular Mold Testing and Prevention Regular mold testing and prevention safeguard both health and property. Routine checks can spot mold before it causes significant issues. Prevention measures reduce the chances of mold establishing a foothold. Proactive maintenance fosters a healthier environment. Early detection minimizes structural damage and costly repairs. Ensuring effective mold management protects investment and occupant well-being. FAQs on Mold Testing and Prevention Curious about mold testing and prevention? You're not alone. Many homeowners have questions on this critical subject. Mold can go unnoticed but cause major problems, so getting answers is key. Common Questions on Mold: · How often should I test for mold at home? · Can I manage mold problems myself? · What are the signs I need professional help? · Is black mold more dangerous than other types? Testing frequency depends on the building's condition and location. If mold is visible or suspected, testing sooner is wise. While DIY methods work for small issues, professionals are best for large or hidden mold problems. Black mold is toxic, and professional guidance is often advised. Understanding these basics empowers you to make informed decisions. Testing and preventing mold need regular attention to keep homes safe and healthy. Additional Resources and Professional Development Staying informed about mold testing is crucial for professionals. Numerous resources and courses can deepen your knowledge. Online platforms offer workshops on mold detection and prevention strategies. Professional certification in mold inspection can enhance your expertise. Joining industry groups allows you to connect with peers and share insights. Continuous learning ensures you provide top-notch services in mold management. Take control of mold issues before they start. Contact a professional service for thorough mold inspections and testing. Protect your property and health by staying proactive in mold prevention efforts.
More Posts